-

The basics
My prints are made by cutting or engraving into lino or wood blocks, inking with a roller, and then hand-pressing paper to the block. Areas that are cut away print white, those that remain print black. Grey is achieved through fine, close cuts, cross-hatching and stippling. The eye does the rest.
I use soft lino for expressive prints like ‘It would make you weep’, and grey lino for work like ‘Ynys Seiriol’ — grey being more akin to wood-engraving. My favoured wood blocks are pear wood and lemon wood.
I hand-press (as opposed to using an etching press) as this allows me to see what is happening to the print. The downside of hand-pressing is the length of time it takes to press each print. Because of this, my editions are generally limited to low numbers.
-

Design
I design on paper from field sketches and photos and then trace or copy the design onto the block and go over the lines with a fine pen or white pencil. The design is reversed on the block so that it prints the right way around onto paper.
My designs are bare bones—skeletons rather than an intricate workings. This light touch allows the finished ‘design’ to emerge from the block itself as marks follows mark and suggests new ideas — I like to think of this as the poetry of tools. They think; I follow.
As I work, I take rubbings using newsprint and a graphite stick. Whilst these are reverse images (as in the photo above) they help give direction to the piece. However, it is only when a print is pressed that I get to see it the ‘right’ way around. A lovely moment and one which at times makes me gasp.
-

Cutting the block
Tools come in all manner of shapes and sizes, and it is tempting to buy them all. In the end, like a good many print artists, I default to a small number. On lino these are a small v-gouge (for fine lines), a medium u-gouge (for wide lines, clearing, and dotting), and a small u-gouge (for fine dotting). For wood blocks I default to a graver. I sometimes use a stippler to ease lino from tight areas, and a large u-gouge to clear big areas of white. All the tools fit neatly into the palm of the hand (the left in my case).
As Clare Leighton noted, when cutting a block ‘one is always working up from the black towards the light.’ (Wood-engraving and woodcuts, 1932). It is a strangely subtractive-additive process: in taking away (moreover, in taking away from nothing, from a flat plane) one creates. You might call the process godly.
-

Pressing
I pull all of my own prints and use oil-based inks and acid-free papers (Somerset, Sunome Senaka, and Awagami washi papers). Being acid free, the papers will keep their original colour and texture for a century and longer.
Before pressing, I brush the block with a toothbrush to ensure that stray flecks of lino or wood are not taken up into the ink. I then lay a line of ink onto toughened glass and roll it out with a hard rubber roller before passing the roller several times over the block. Lino needs more ink than a wood block.
When the block has a smooth sheen, I line it up using a card frame and carefully lay down the paper — pressing it lightly with the heel of my hand. I then ‘press’ the print by burnishing the paper with a spoon and sometimes a baren. Finally, I hang the print to dry in the air.
-
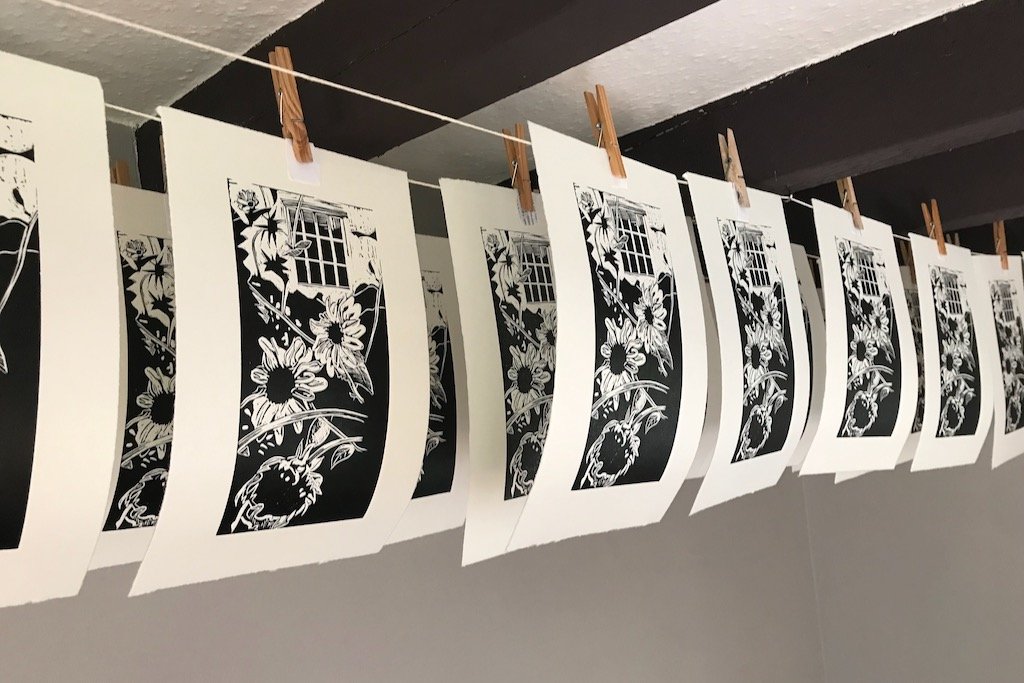
Editioning the prints
My prints are, in the main, limited editions. The size of any one edition, and the number of a print within it, I write in pencil beneath the printed area. 3/25, for example, denotes print no.3 in an edition limited to 25 prints. Once the prints are editioned, no further prints are made from the block.
Hand-pressing is an artisan process and not a mechanised one, and as such there will always be slight variations between prints within an edition, particularly when the prints contain large areas of black. If a print is over-inked or under-inked, it fails to make the edition and is not offered for sale.
Editioned prints are titled in pencil beneath the impression, signed and dated. I sell them unframed and store them in the meantime wrapped in glassine paper.
-
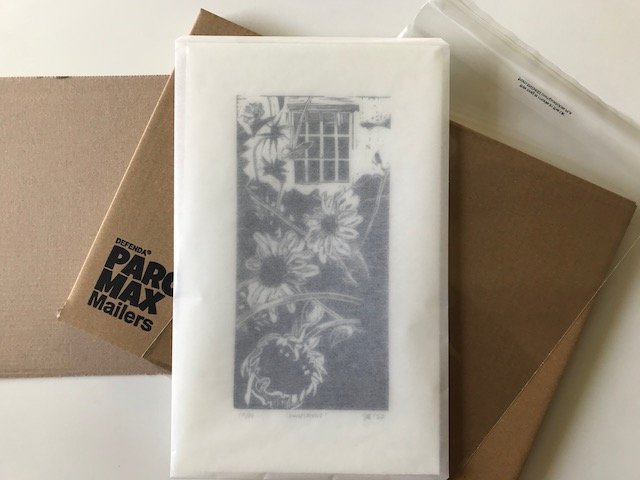
Packaging
Having explored various options for packaging prints, I now package my prints flat. All of the packaging that I use can be composted and or recycled (the packing tape included).
Each print is wrapped in glassine paper (an acid free paper used in galleries and archives to protect documents and artwork) and sealed in a cellophane envelope to further protect them from damp. Despite its glossy appearance, glassine is 100 per cent paper and is neither waxed nor coated.
When wrapped, I protect the print with cardboard stiffeners and seal it within stout cardboard mailers. This ensures that the print won’t bend or fold and can therefore be mailed safely.